Published: October 11, 2026 | Last Updated: October 11, 2026
Cold water rescue and ice rescue is one of the most dangerous operational environments in emergency response. Unlike open water rescue, ice rescue combines the risk of thin ice breaking underfoot, cold water shock that can cause involuntary inhalation within seconds, and rapid hypothermia that renders victims unable to self-rescue within minutes. This guide covers the complete ice rescue equipment spectrum from specialized ice rescue suits and PFDs to ice picks, reach poles, ice sleds, and cold water rescue and immersion first aid protocols, designed for professional fire departments, cold water rescue teams, search and rescue teams, and government procurement officers.
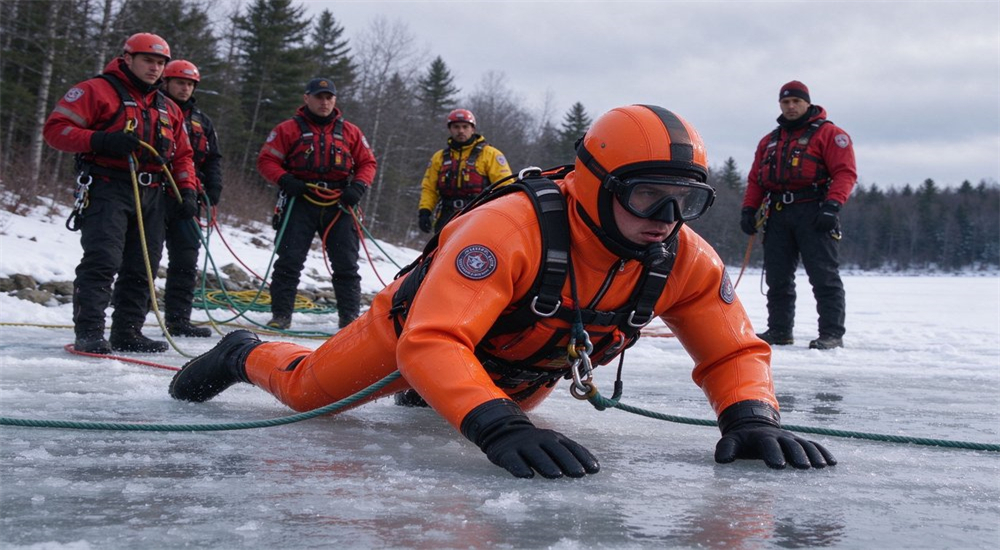
Every year, ice-related drownings occur across North America, Europe, and Asia when victims fall through thin ice that appeared safe from shore. The U.S. Coast Guard and Canadian Red Cross both emphasize that self-rescue from ice water is extremely difficult without proper equipment, and bystander attempts without ice rescue gear frequently result in multiple fatalities. This guide follows the progression from risk assessment through equipment selection, operational techniques, post-rescue medical care, and long-term gear maintenance.
When evaluating cold water rescue gear, teams should prioritize equipment that provides both thermal protection and flotation, as hypothermia and drowning are the leading causes of ice rescue fatalities.
Ice rescue operations face three simultaneous lethal factors that no other rescue environment combines. First, thin ice can break without warning, plunging rescuers into water that may be below freezing. Second, cold water shock triggers an involuntary gasp reflex that can cause immediate water aspiration and cardiac stress. Third, hypothermia progresses rapidly, with fine motor skills lost within minutes and consciousness fading within an hour depending on water temperature. Equipment must address all three factors simultaneously, which is why standard water rescue gear is insufficient for ice operations. Teams should also review water rescue PFD options and water rescue helmets for complementary equipment.
Comprehensive ice safety equipment includes not only personal flotation devices but also visual signaling tools, communication devices, and emergency shelters for prolonged operations.
The widely recognized 1-10-1 principle, developed by cold water survival expert Dr. Gordon Giesbrecht and promoted by the Canadian Red Cross and U.S. Coast Guard, describes the physiological timeline of cold water immersion. During the first minute, victims experience cold water shock with uncontrollable gasping and hyperventilation. In the next 10 minutes, cold incapacitation causes loss of finger dexterity and muscle strength, making self-rescue nearly impossible. After approximately one hour, hypothermia leads to unconsciousness. Ice rescue equipment must be designed to operate within these critical time windows, with rescuers able to reach and extract victims before the 10-minute incapacitation threshold.
When selecting equipment for these operations, teams should balance buoyancy, thermal protection, and mobility based on the specific water conditions and mission duration. Regular inspection and maintenance of all gear ensures reliability when seconds count.
The ice rescue sled serves as a multi-purpose platform that distributes rescuer weight, transports equipment, and provides a stable surface for victim packaging during extraction.
According to data compiled from the U.S. Centers for Disease Control and the Canadian Red Cross, ice-related drownings account for a significant portion of winter recreational fatalities in northern climates. Many incidents involve children and snowmobile operators, with a disturbing pattern of multiple fatalities when bystanders attempt rescue without proper training or equipment. These statistics underscore why professional teams must maintain fully stocked ice rescue equipment kits and conduct regular training before ice season begins.
Cold water immersion triggers a cascade of physiological responses including gasp reflex, tachycardia, and rapid cooling of peripheral tissues, making immediate flotation and extraction critical.
Not all ice is created equal, and identifying ice type is the first safety step before any ice operation. Black ice, also called clear ice, forms from slow freezing of still water and is the strongest type, with a transparent dark appearance that reveals the water below. White ice, or snow ice, forms when snow saturates the ice surface and refreezes, creating a porous, weaker structure that may be only half as strong as black ice of the same thickness. Grey ice indicates water-saturated ice that is actively melting and is structurally unsafe. Rescue teams should always assume ice is weaker than it appears and use ice thickness measurement tools before committing personnel.
The following table summarizes the key specifications to compare when selecting ice rescue suits, helping procurement teams match equipment to operational requirements and budget constraints.
Structured ice rescue training programs should progress from awareness to operations to technician levels, with annual refreshers to maintain skill proficiency and team coordination.
|
Ice Type |
Appearance |
Formation |
Relative Strength |
Safety Level |
|
Black/Clear Ice |
Transparent dark, see-through |
Slow freezing of still water |
100% (strongest) |
Safer at adequate thickness |
|
White/Snow Ice |
Opaque white, cloudy |
Snow saturation and refreezing |
50% of black ice |
Requires double thickness |
|
Grey Ice |
Grey, waterlogged |
Melting, spring conditions |
Unreliable |
Unsafe for any weight |
|
Slush Ice |
Slushy, mixed water |
Partial melt or freeze |
Minimal |
Never safe |
The standard ice thickness guidelines used by rescue agencies and NOAA outdoor safety organizations provide minimum thickness for various activities. For clear black ice, 4 inches is considered minimum for individual walking, 5-6 inches for snowmobiles and ATVs, 8 inches for small cars or light trucks, and 12-15 inches for medium trucks. However, these figures assume uniform clear ice; white ice requires roughly double the thickness, and any ice with cracks, flowing water underneath, or near shoreline structures should be treated as significantly weaker. Rescue teams should always measure ice thickness at multiple points along the approach route rather than relying on visual assessment alone.
The buoyancy rating of an ice rescue suit is measured in Newtons, with professional models typically providing 150N or more to support the rescuer plus full gear weight.
When selecting equipment for these operations, teams should balance buoyancy, thermal protection, and mobility based on the specific water conditions and mission duration. Regular inspection and maintenance of all gear ensures reliability when seconds count.
Government stockpile programs should include spare suits, replacement parts, and consumable items to ensure continuous operational readiness during extended ice rescue seasons.
Certain locations consistently produce thinner or weaker ice regardless of overall conditions. Areas where water flows into or out of a lake, such as stream inlets and outlets, have moving water that prevents solid freezing and creates thin ice zones. Natural underwater springs release warmer water that melts ice from below. Bridge piers and concrete structures absorb heat and create thin ice radiating outward. Shaded areas under trees or cliffs receive less solar radiation and may have thinner ice than surrounding areas. Rescue personnel should map these hazard zones during pre-season planning and approach any ice operation with the assumption that hidden weak spots exist.
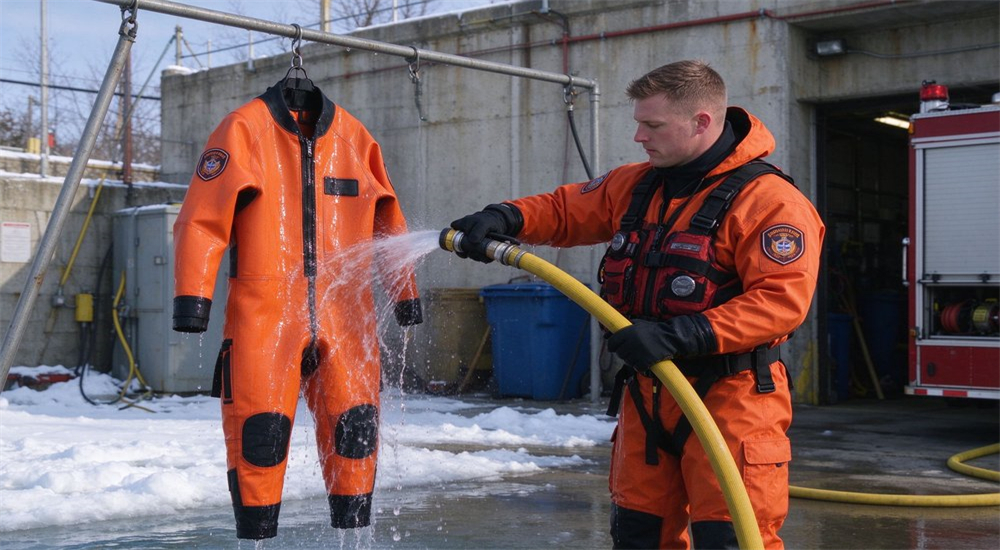
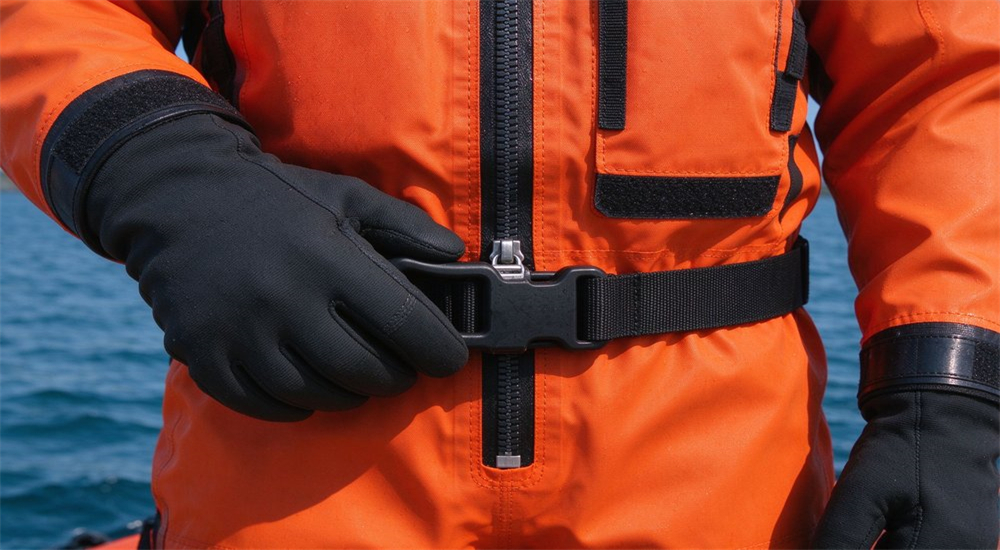
A waterproof zipper with a protective storm flap is essential for preventing water intrusion, as even small leaks can lead to rapid heat loss and compromised rescue performance.
Professional ice rescue teams carry dedicated tools for measuring ice thickness before and during operations. An ice auger drills a clean hole through the ice for direct measurement and can also be used to create access points for water rescue. An ice chisel or spud bar is a long metal bar with a sharpened end that rescuers strike into the ice to test thickness and sound for hollow areas. A thickness pole or ice probe is marked with depth increments and inserted through drilled holes to measure ice and water depth. These tools should be carried on every ice response, with measurements taken at regular intervals along the rescue approach path.
Thermal insulation in ice rescue suits relies on closed-cell foam layers that trap warm air next to the body while preventing water absorption that would increase weight and reduce mobility.
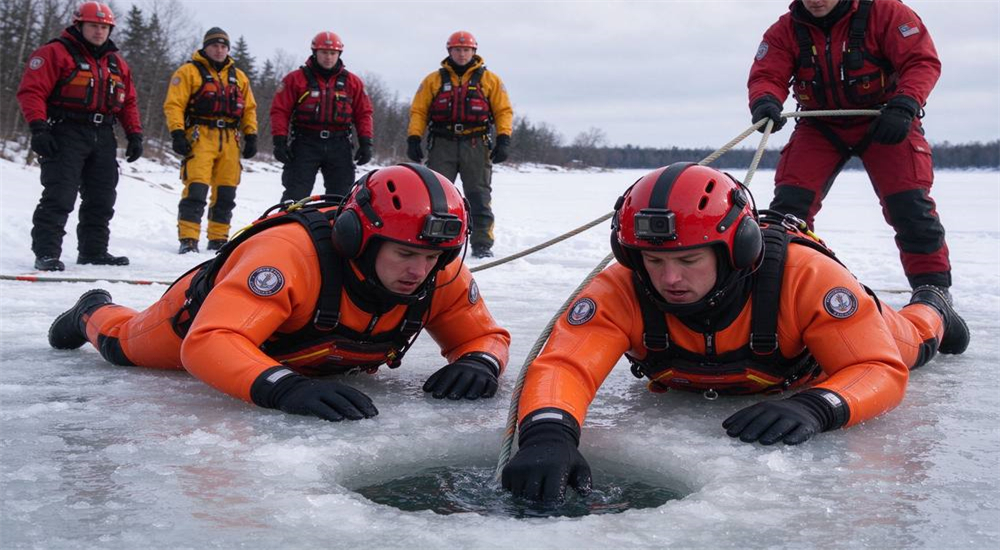
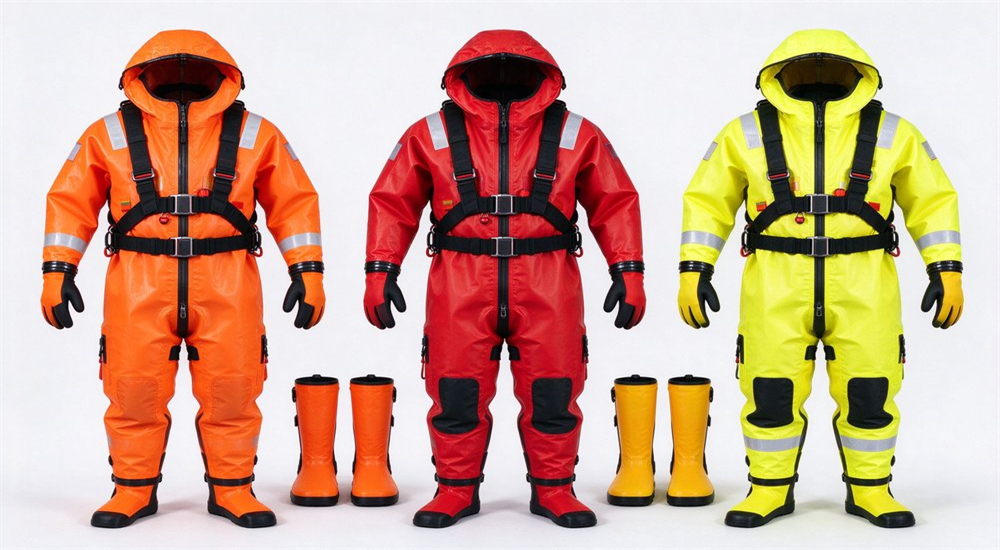
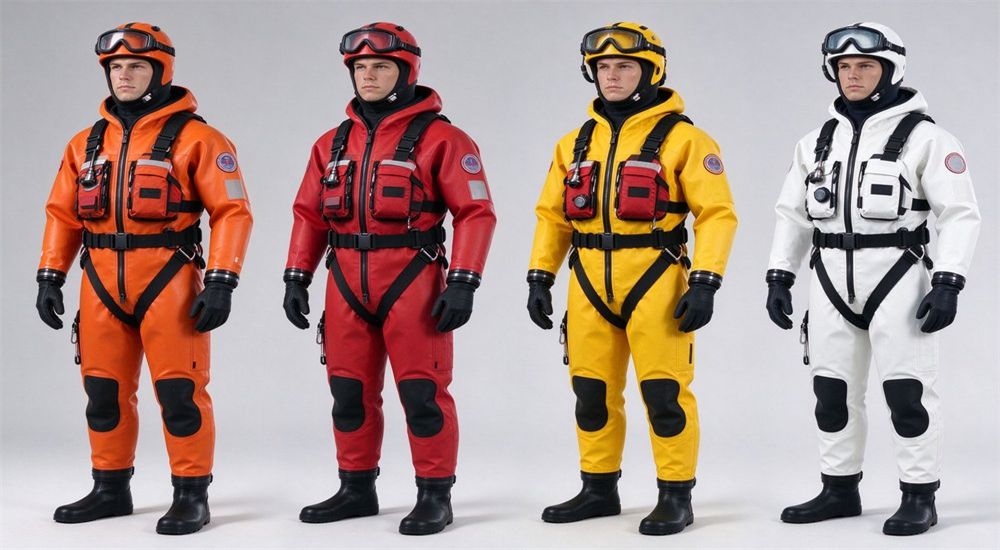
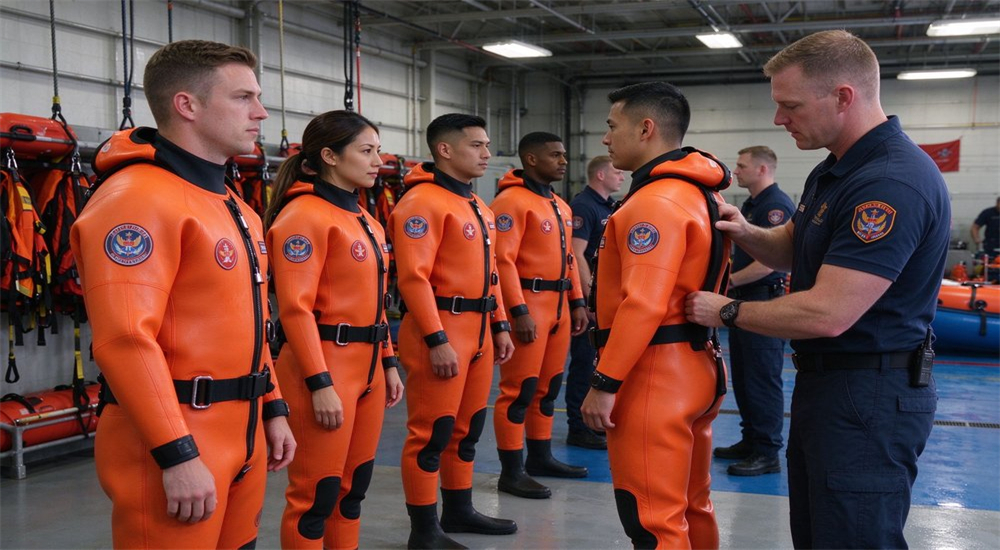
A true ice rescue suit differs significantly from a standard diving dry suit or flood rescue dry suit. While all three provide waterproof protection, ice rescue suits integrate additional features specific to ice operations. The most critical difference is built-in buoyancy of 150 Newtons or more, ensuring that a rescuer who falls through ice remains face-up in the water without needing a separate PFD. Ice rescue suits also feature specialized soles with ice cleats or aggressive tread patterns for traction on slippery ice surfaces, and high-visibility colors (typically international orange or red) that remain visible in blowing snow and whiteout conditions. Standard dry suits lack these integrated features and should not be used as a substitute for dedicated ice rescue suits.
The buoyancy distribution in an ice rescue suit is engineered to automatically rotate a wearer into a face-up position if they enter the water. This is achieved through strategically placed buoyancy foam in the chest and upper torso area, creating a center of buoyancy that lifts the head and chest above water. This design is critical because a rescuer who falls through ice may be disoriented or momentarily incapacitated by cold water shock, and cannot rely on manual positioning to keep their airway clear. The automatic face-up feature provides an essential safety margin, buying time for team members to execute a rescue of their own personnel.
Ice rescue suits use a one-piece construction to eliminate gaps where water could enter, with latex or silicone neck seals and wrist seals that create a watertight barrier. The insulation layer typically consists of closed-cell foam or thermal lining that traps a layer of air next to the body, providing both buoyancy and thermal protection. Some advanced models offer optional heated liners or chemical warming pockets for extended operations in extreme cold. The suit should be sized to allow layering underneath with thermal base layers and mid-layers, while maintaining a snug enough fit that the seals function properly. Teams operating in climates with temperatures below -20°C should prioritize suits with maximum insulation rating and compatibility with heated accessories.
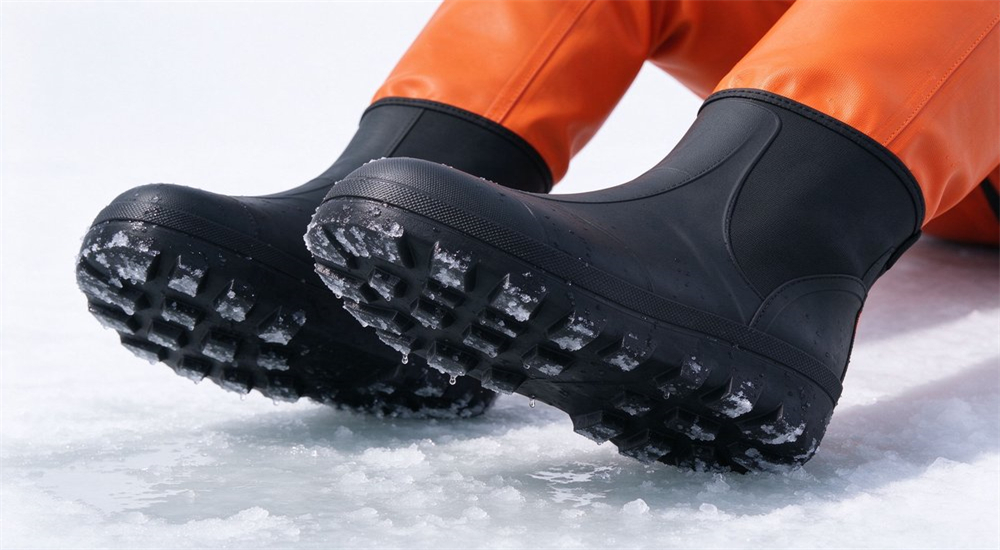
The sole of an ice rescue suit is a critical safety component that determines whether rescuers can maintain footing on smooth ice surfaces. Two main sole systems are used: steel spike cleats that penetrate the ice surface for maximum traction, and aggressive rubber tread patterns that grip without damaging ice or indoor floors. Steel cleats provide superior traction on hard ice but can be slippery on bare ground or concrete and may damage boat decks. Rubber tread soles are more versatile but offer less grip on glare ice. Some suits feature a hybrid design with retractable cleats or a combination sole. Teams should conduct traction testing on local ice conditions before selecting a sole type, and consider that rescuers often transition between ice, snow, shoreline, and vehicle surfaces during a single operation.
Proper helmet fit is critical for ice rescue operations, as ill-fitting helmets can shift during entry and impede vision or communication. Teams should conduct fit checks with all hood configurations and communication devices before deployment.
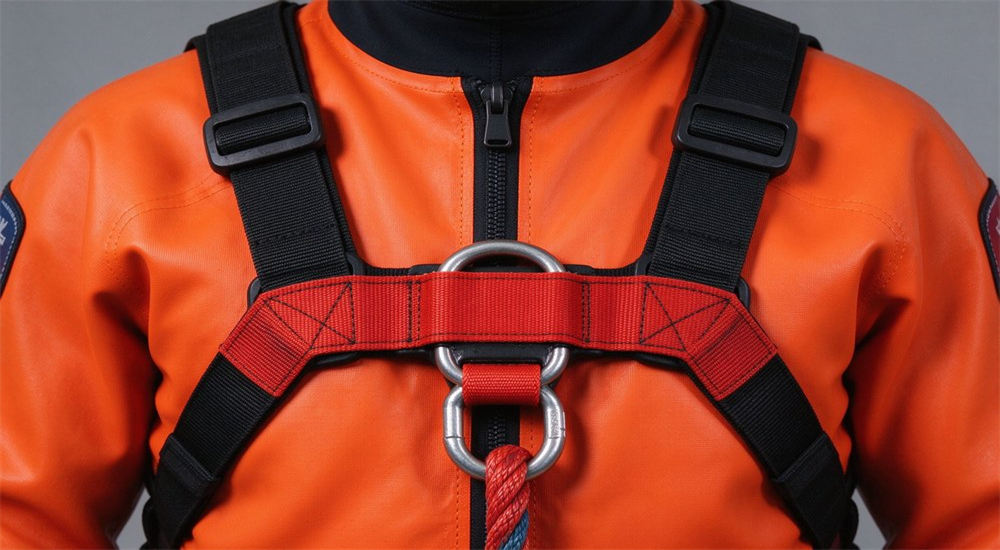
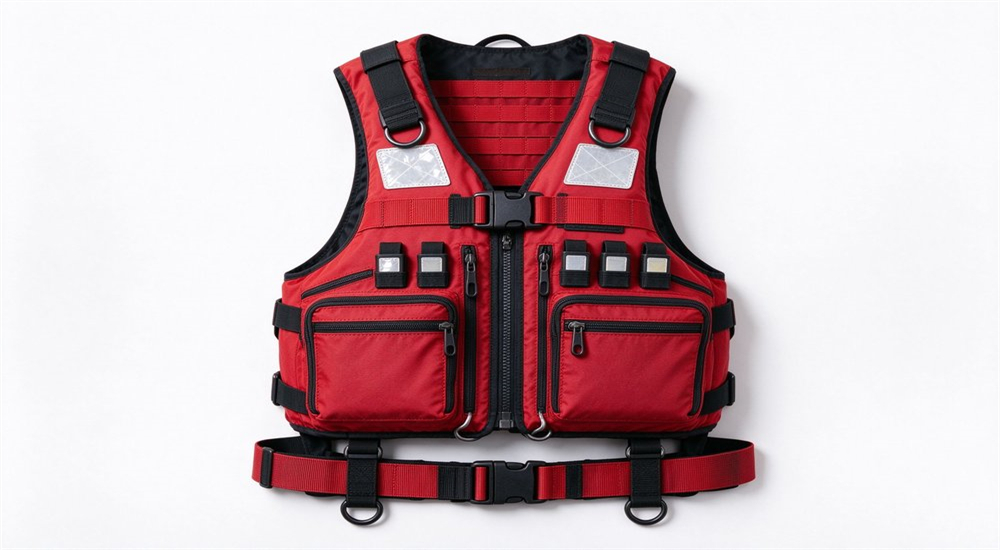
While ice rescue suits provide integrated buoyancy, many teams also use a separate ice rescue PFD ice rescue PFD for additional flotation or for team members not wearing full suits. Ice rescue PFDs have special requirements beyond standard water rescue PFDs. Buoyancy should be 150 Newtons or higher to support the weight of heavy winter clothing and equipment that becomes waterlogged. A quick-release harness system allows the PFD to be rapidly removed if it becomes snagged under ice, a critical safety feature unique to ice operations. The PFD must not restrict the low crawling posture that rescuers use to distribute weight on thin ice, so bulky front panels or excessive padding can be problematic. Some ice-specific PFDs feature a low-profile design with buoyancy concentrated in the back and sides to preserve mobility.
For victims still in the water, rescue buoys and flotation straps provide immediate buoyancy support while rescuers work to extract them. A rescue buoy is a torpedo-shaped flotation device attached to a line that can be thrown or slid across ice to a victim. Flotation straps are webbing loops with foam inserts that victims can slip over their arms or around their torso to stay afloat. These devices are particularly valuable because they can be deployed from a safe distance without requiring rescuers to approach the ice edge. Teams should carry multiple buoys and straps in their ice rescue kits, as victims may lose grip or the devices may drift in moving water.
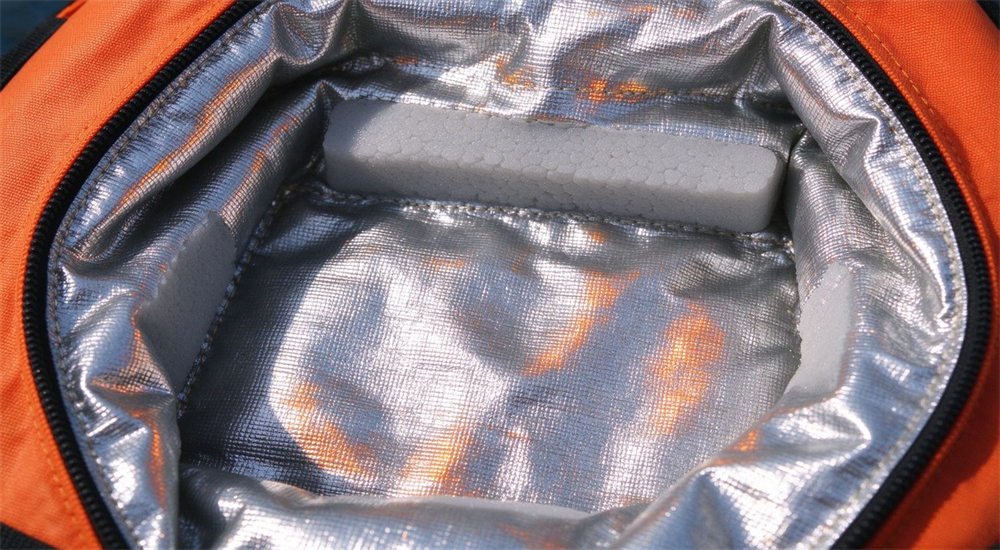
Beyond primary PFDs, ice rescue teams may use supplementary flotation gear for specific roles. Flotation pants provide lower-body buoyancy that helps keep rescuers horizontal in the water, reducing the risk of vertical sinking under ice. Flotation vests worn under or over suits add backup buoyancy. Thermal buoyancy bags combine insulation and flotation in a compact bag that can be deployed around a victim after extraction to prevent further heat loss while providing additional floatation if secondary immersion occurs. These items expand the team capability beyond basic PFDs and should be selected based on the specific operational profile of the team.
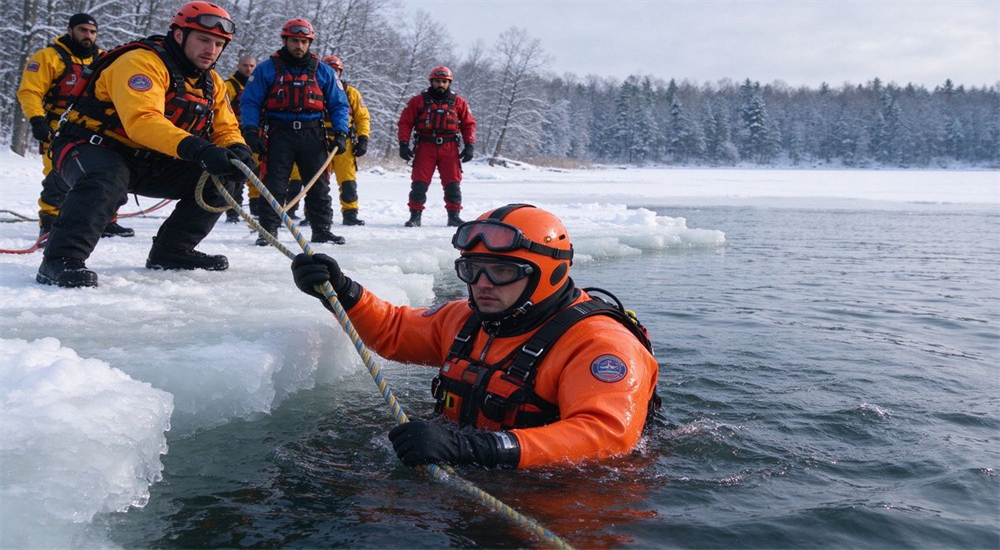
Helmets for ice rescue must balance three requirements that often conflict: impact protection from falls on ice and overhead hazards, thermal insulation for sub-zero temperatures, and visor clarity that resists fogging from breath and temperature differentials. A standard construction or rock climbing helmet provides impact protection but lacks warmth and visor options. A winter sports helmet offers warmth but may not meet rescue impact standards. The ideal ice rescue helmet combines a certified impact-resistant shell with removable ear pads and insulation, a clear anti-fog visor or goggle compatibility, and a chin strap that remains secure when wet. Some teams use water rescue helmets with added neoprene hoods underneath for thermal insulation and protection.
Fogged visors are a serious safety hazard in ice rescue, reducing situational awareness at the moment when rescuers need maximum visibility. Anti-fog technology has advanced significantly, with three main approaches. Dual-lens visors create an insulating air gap between two panes that prevents the inner surface from reaching dew point. Anti-fog coatings are hydrophilic treatments that spread moisture evenly across the lens rather than allowing droplets to form. Ventilation design uses strategic vents to allow air circulation that carries away moist exhaled air. The best helmets combine all three approaches, with vent systems that can be closed in extreme cold or blowing snow. Teams should test helmets in actual cold conditions before purchase, as lab anti-fog ratings do not always translate to field performance with heavy exertion.
Ice rescue helmets must keep ears warm in freezing temperatures while preserving the ability to hear commands, radio communications, and victim sounds. Full ear coverage with thick insulation provides warmth but can muffle sounds and interfere with radio earpieces. Open ear designs preserve hearing but expose ears to frostbite risk. The best solution is a helmet with removable ear pads that offer moderate insulation while leaving the ear canal partially open, combined with a communication system that uses bone conduction or in-ear speakers. Teams operating in extreme cold may add a thin balaclava under the helmet for additional warmth, but should test that the helmet retention system remains secure with the extra layer.
Most ice rescue suits include an attached hood for additional thermal protection and water exclusion. The helmet must fit properly over or under this hood without compromising either system. If the helmet is worn over the hood, the hood fabric may interfere with the chin strap or visor mechanism. If worn under the hood, the helmet may not sit securely on the head. Teams should test helmet and suit combinations together during training, ensuring that the helmet remains stable during crawling, climbing, and simulated immersion. Some suit manufacturers offer helmet-compatible hood designs with reinforced openings that accommodate helmet straps and visor movement.
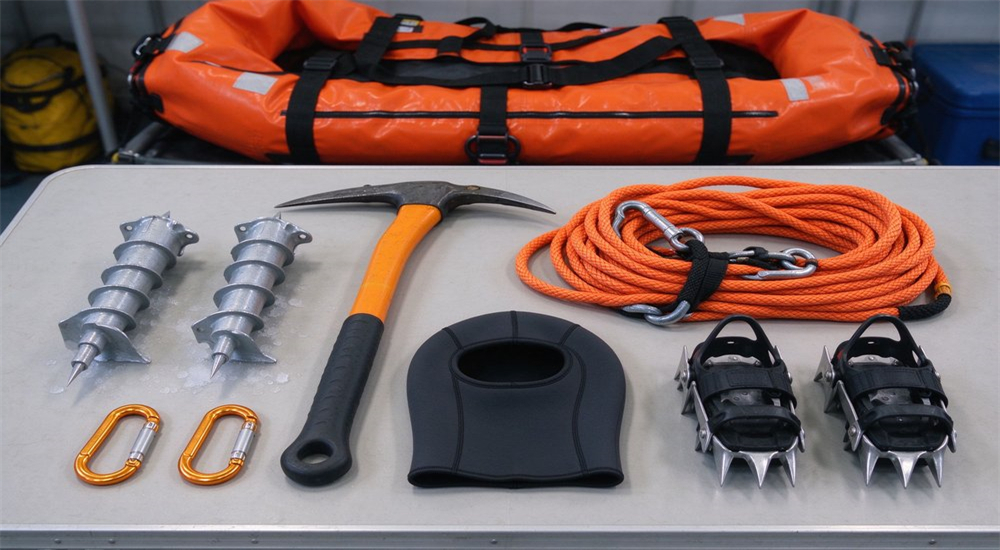
Ice picks are perhaps the most important self-rescue device for anyone venturing onto ice. They consist of two sharp metal spikes connected by a cord or strap, worn around the neck so they are always accessible. If a person falls through ice, they use the picks to grip the ice edge and pull themselves onto the ice surface by kicking their feet and rolling their body onto the thicker ice. Ice picks should be worn under the outer layer but above thermal layers, with the cord long enough to reach both hands simultaneously. The technique involves driving both picks into the ice simultaneously, pulling the upper body onto the ice, then kicking with feet to propel forward while maintaining a horizontal position to distribute weight. Public education programs should emphasize ice safety equipment and proper usage that ice picks are only effective if worn before going onto ice, not carried in a pocket.
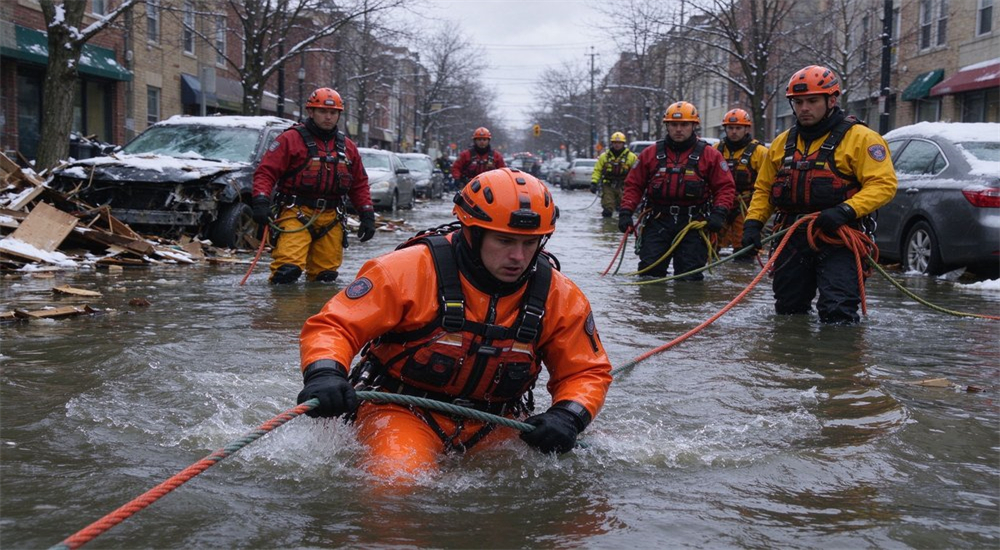
The reach pole is the first-line rescue tool for ice operations, allowing rescuers to reach a victim from a safe distance on stable ice. Standard ice rescue reach poles extend from 6 to 8 meters, with some models reaching 10 meters, and feature a non-slip grip and a T-handle or loop at the victim end. The telescoping design allows compact transport and rapid deployment. Using the reach pole follows the "Reach" phase of the Reach-Throw-Row-Go progression, keeping rescuers on solid ice while extending assistance to the victim. The pole should be deployed from a kneeling or lying position to distribute the rescuer weight, with a second team member providing backup safety by holding the rescuer feet or a tether line.
Additional cold water rescue gear including throw bags, reach poles, and ice picks should be readily accessible on every ice rescue operation, as equipment failure or loss can occur during dynamic rescue scenarios.
An ice rescue sled is a specialized flotation device that rescuers lie on or kneel on to distribute their weight over a larger area, allowing them to cross thin ice that would not support standing weight. The sled typically consists of a rigid or semi-rigid frame with a smooth bottom that slides on ice and snow, combined with flotation material that provides buoyancy if the ice breaks. Some sleds are designed as rescue platforms that can also transport a victim back to shore, while others are primarily for rescuer mobility. The sled is used in the "Row" phase of rescue progression when the victim is beyond reach pole distance but the ice is too thin for safe walking. Rescuers tether themselves to shore and use arm paddling or ice picks to propel the sled across the ice surface.
Rope systems are essential for ice rescue, providing safety tethers for rescuers on thin ice, mechanical advantage for victim extraction, and anchor points for team operations. Ice anchors can be established using ice screws driven into thick ice, or by using existing solid objects such as trees or vehicles on shore. A tension system using a main line and belay line allows a rescuer to approach the ice edge with a safety backup that can be used to pull them back if the ice breaks. Rescue pulleys and prusik cords create mechanical advantage systems for lifting victims from the water onto the ice, a task that is extremely difficult manually because of the suction effect of water and the weight of waterlogged clothing. Teams should carry a dedicated rope kit with static ropes, pulleys, carabiners, and ice screws as part of their ice rescue equipment cache.
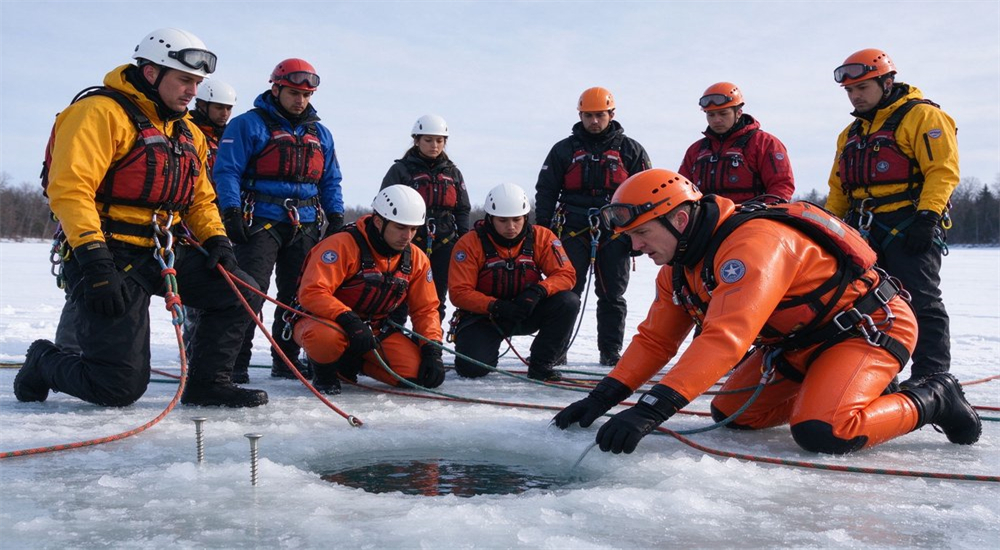
The "Reach" phase is the safest ice rescue technique and should always be attempted first. Rescuers remain on stable ice and extend a reach pole, ladder, or other rigid object to the victim. This keeps the rescuer completely out of the water and on ice that has already been tested for strength. The reach technique is effective when the victim is within 6-8 meters of solid ice and is conscious and able to grasp the pole. Rescuers should operate from a prone or kneeling position to distribute their weight, with a backup team member providing a safety tether. If the victim cannot reach the pole or the ice edge is too unstable, the team progresses to the next technique.
When the victim is beyond reach pole distance, the "Throw" phase uses a throw bag or rescue buoy deployed from shore or stable ice. A throw bag contains 15-30 meters of floating rope in a compact bag that can be accurately thrown to a victim. The victim grasps the rope and is pulled to safety, or the rope is used to tow a flotation device to the victim. Throw technique requires practice for accuracy, as throwing into wind or onto slippery ice can cause the rope to fall short or slide. The rescuer should anchor themselves before pulling, as a panicked victim can pull an unsecured rescuer into the water. Multiple throw bags may be needed if the first attempt misses or the victim loses grip.
For victims beyond throwing distance or when the ice between shore and victim is too thin for walking, the "Row" phase uses an ice sled or inflatable rescue boat to cross the dangerous zone. Rescuers on a sled distribute their weight and can traverse ice that would break under standing weight. Inflatable boats can be slid across ice and then deployed in open water areas or larger holes. This technique requires more personnel and equipment than Reach or Throw, and rescuers using sleds or boats must be tethered to shore with safety lines. The Row phase is often combined with Throw, where the sled rescuer carries a throw bag to deploy once within range of the victim.
When selecting equipment for these operations, teams should balance buoyancy, thermal protection, and mobility based on the specific water conditions and mission duration. Regular inspection and maintenance of all gear ensures reliability when seconds count.
Proper equipment maintenance and regular inspection schedules ensure that all gear remains in optimal condition throughout the ice rescue season, reducing the risk of equipment failure during critical operations.
The "Go" phase is the last resort, where a rescuer wearing a full ice rescue suit intentionally enters the water to reach a victim who cannot be assisted by any other technique. This is the most dangerous option because the rescuer is now exposed to the same cold water shock and hypothermia risks as the victim, and the team must manage two people in the water. Go rescues should only be attempted by properly trained and equipped rescuers, with a dedicated backup team ready to perform a rescue of the primary rescuer if needed.
This comparison table outlines the essential ice rescue tools and their specific applications, enabling teams to build a comprehensive equipment inventory based on mission profiles and team size.
|
Technique |
Distance Range |
Minimum Personnel |
Key Equipment |
Risk Level |
|
Reach |
0-8 meters |
2 rescuers |
Reach pole, ladder, PFD |
Low |
|
Throw |
5-30 meters |
2-3 rescuers |
Throw bags, rescue buoy, anchor |
Low-Medium |
|
Row |
15-50+ meters |
3-4 rescuers |
Ice sled, inflatable boat, tethers |
Medium |
|
Go |
Any distance |
4-5 rescuers |
Ice rescue suit, helmet, tether, backup team |
High |
The cold water shock phase begins immediately upon immersion and lasts approximately 1-3 minutes. During this phase, victims experience an involuntary gasp reflex, rapid breathing, increased heart rate, and potential cardiac arrhythmia. The most critical intervention is to help the victim control their breathing and keep their airway above water. Rescuers should verbally coach the victim to breathe slowly and avoid panic movements that increase heat loss and energy expenditure. If the victim is wearing a PFD or ice rescue suit, their airway should remain above water automatically. Victims should be instructed to float rather than swim, as swimming increases heat loss by 35% compared to remaining still. The 1-minute breathing control window is the most critical period for preventing aspiration and panic.
After the initial cold shock and cold incapacitation phases, hypothermia begins to develop as core body temperature drops below 35°C (95°F). In ice water near 0°C, core temperature can drop at rates of 2-4°C per hour depending on body mass, clothing, and activity level. Early hypothermia symptoms include shivering, confusion, and loss of dexterity. Moderate hypothermia brings violent shivering that then stops, slurred speech, and impaired judgment. Severe hypothermia results in unconsciousness, weak pulse, and potentially fatal cardiac arrhythmias. Rescue teams should recognize that a victim who appears dead may still be salvageable, and the axiom "no one is dead until warm and dead" guides prolonged resuscitation efforts in cold water cases.
When selecting equipment for these operations, teams should balance buoyancy, thermal protection, and mobility based on the specific water conditions and mission duration. Regular inspection and maintenance of all gear ensures reliability when seconds count.
Once a victim is extracted from ice water, immediate post-rescue warming is critical to prevent further temperature drop and afterdrop, where cold blood from the extremities returns to the core and causes a further temperature decrease. The victim should be removed from wet clothing and dried, then wrapped in a thermal blanket or sleeping bag with insulation underneath to prevent heat loss to the ground. Hot water bottles or chemical heat packs should be applied to the neck, armpits, and groin areas where major blood vessels are close to the surface. Conscious victims may be given warm, sweet drinks to provide internal warming, but alcohol and caffeine should be avoided. Victims should be handled gently, as rough movement can trigger cardiac arrhythmias in severe hypothermia cases.
All victims of ice water immersion should be monitored for at least 24 hours after rescue, even if they appear to recover quickly. The risk of secondary drowning (also called delayed drowning) occurs when aspirated water causes lung inflammation and fluid accumulation that develops hours after the initial incident. Symptoms include coughing, shortness of breath, chest pain, and fatigue that may not appear for 1-24 hours. Additionally, hypothermia victims may experience afterdrop and continued temperature decline even after removal from water. Medical evaluation is strongly recommended for all ice water immersion victims, and teams should provide clear post-rescue instructions to victims and their families about warning signs that require immediate medical attention.
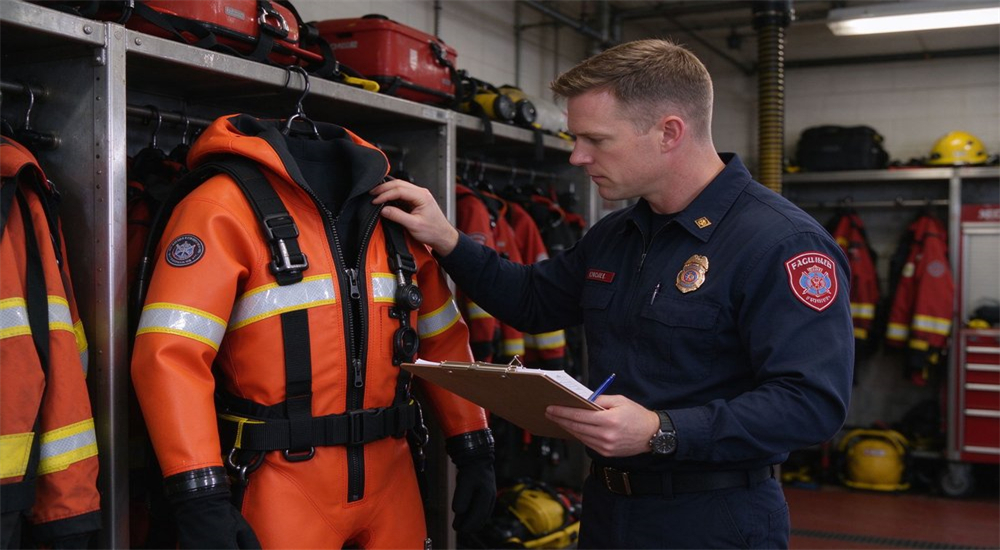
Before each ice season begins, every ice rescue suit should undergo a thorough inspection. The neck and wrist seals should be checked for cracks, tears, or loss of elasticity that would compromise waterproofing. Latex seals degrade over time even with proper storage and typically need replacement every 1-3 seasons depending on use. The buoyancy foam should be inspected for compression, permanent deformation, or water absorption that would reduce flotation performance. The sole tread or ice cleats should be checked for wear, with worn cleats replaced or sharpened. Zippers should be tested for smooth operation and lubricated with beeswax or silicone zipper lubricant. Each suit should also undergo a visual inspection for cuts, abrasions, or seam separation that could indicate structural weakness.
For teams using inflatable PFDs, inflatable ice rescue suits, or inflatable rescue boats, pre-season inspection includes verifying that all CO2 cylinders are at full pressure and within their expiration date. The trigger mechanism should be tested for proper function, with manual override levers moving freely. All inflatable components should undergo an air tightness test by inflating to full pressure, applying a soapy water solution, and checking for bubbles that indicate leaks. Valves should be cleaned and inspected for debris. Inflatable PFDs should be armed with new cylinders and indicators showing green or ready status. Any component that fails the air test should be repaired or replaced before the season begins.
Ice picks should be checked for sharpness, as dull picks cannot penetrate hard ice and render the self-rescue function useless. Picks can be sharpened with a file or replaced if the metal is too worn. The connecting cord should be inspected for fraying, UV damage, or rot, with any damaged cord replaced immediately. Reach poles should be extended and retracted fully to check that all locking mechanisms engage securely and that the pole does not collapse under load. The T-handle or victim end should be secure and free of cracks. Any rope attached to the pole or carried in throw bags should be inspected for fraying, cuts, or UV degradation, with retirement criteria based on the rope manufacturer specifications or whenever damage is visible.
Proper off-season storage significantly extends the lifespan of ice rescue equipment. Ice rescue suits should be thoroughly cleaned and dried before storage, with all zippers partially open to prevent seal compression. Suits should be stored flat or on wide hangers in a cool, dry location away from direct sunlight, ozone sources, and chemical fumes. Heavy objects should never be placed on top of stored suits, as this can permanently compress buoyancy foam and deform seals. Inflatable equipment should be stored partially inflated or according to manufacturer instructions, with cylinders removed and stored separately in a dry location. Ropes should be coiled loosely and stored in breathable bags, not sealed plastic containers that trap moisture. A pre-season inspection checklist should be completed and documented before each ice season, with any deficiencies corrected before the equipment is placed in service.
Regular waterproof zipper maintenance includes cleaning the track with fresh water after each use, applying silicone-based lubricant to prevent corrosion, and inspecting for bent teeth or damaged sliders. A failed zipper during an ice rescue can lead to catastrophic water intrusion and hypothermia.
Professional ice rescue training is typically organized into progressive certification levels. The Awareness level provides basic knowledge of ice hazards and rescue principles for personnel who may respond but not perform technical rescue. The Operations level trains rescuers to perform non-entry techniques including Reach, Throw, and Row operations, typically requiring 16-24 hours of training. The Technician level qualifies rescuers for entry-level Go rescues in ice rescue suits, requiring 40-80 hours including pool sessions and live ice training. Some agencies offer advanced specialties such as ice rescue instructor, tether management, and surface ice rescue specialist. Certification should be maintained through annual refresher training and documented skills verification.
Ice rescue suit donning speed is a critical skill because in real emergencies, every minute of delay reduces victim survival chances. Teams should train to achieve a donning time of under 2 minutes for a complete ice rescue suit including boots, gloves, and helmet. This requires practice with the specific suit model used by the team, as different suits have different closure systems and seal arrangements. Ice rescue training should include donning while wearing base layers and in cold conditions where finger dexterity is reduced. Teams should also practice rapid equipment deployment from the response vehicle, including pre-staged kits that minimize the time between arrival on scene and rescuer readiness. Regular timed drills maintain proficiency and identify equipment issues such as stuck zippers or tangled harness straps.
When selecting equipment for these operations, teams should balance buoyancy, thermal protection, and mobility based on the specific water conditions and mission duration. Regular inspection and maintenance of all gear ensures reliability when seconds count.
Ice rescue training should progress from controlled pool environments to real ice conditions. Pool training provides a safe environment to practice suit familiarization, cold water entry, victim contact techniques, and basic rope work without the hazards of actual ice. Pool sessions should include full suit immersion, face-down rotation testing, and simulated victim carries. Real ice training is essential for developing skills that cannot be replicated in a pool, including ice thickness assessment, crawling on thin ice, ice pick self-rescue, sled operation, and actual victim extraction through an ice hole. Real ice training should be conducted at a controlled site with safety divers on standby and water temperatures that provide realistic cold stress without exceeding safe training limits.
Ice rescue skills are perishable, and annual refresher training is essential to maintain operational readiness. Refresher sessions should include a review of cold water physiology, equipment inspection, practical skills stations, and a full-scale simulated rescue. Teams should also establish an equipment replacement cycle based on manufacturer recommendations, usage frequency, and inspection results. Typical replacement cycles include ice rescue suits every 5-10 years depending on usage, PFDs every 5-7 years or after any water entry, ropes every 3-5 years or after significant load events, and helmets every 3-5 years or after any significant impact. A documented equipment lifecycle management program ensures that gear is replaced before it fails in service.
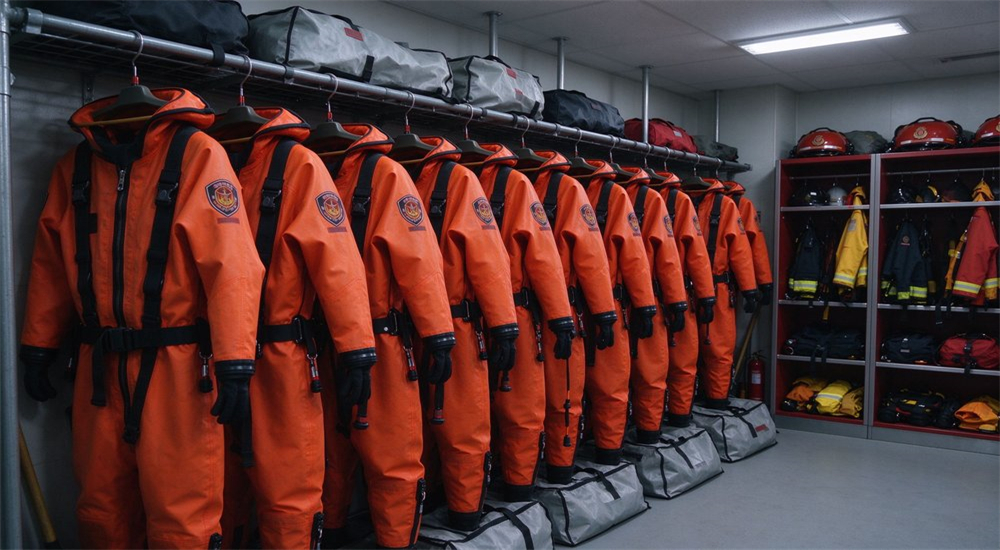
Ice rescue suits range in price from approximately $800 for basic models to $2500 or more for high-end professional systems. Several factors influence price. Buoyancy rating affects cost, with 150N+ suits commanding a premium over 100N models. Material quality varies from basic nylon trilaminate to heavy-duty cordura with reinforced knees and elbows. Seal type ranges from economical latex to premium silicone that lasts longer and is more comfortable. Integrated features such as built-in harnesses, communication pockets, and heating systems add cost. Certifi
The table below provides a structured budget framework for ice rescue equipment procurement, helping government agencies and rescue organizations allocate resources across essential categories.
|
Equipment Category |
Quantity |
Unit Price Range |
Subtotal Range |
Notes |
|
Ice Rescue Suits |
3 |
$1,200-2,000 |
$3,600-6,000 |
150N+ buoyancy, ice cleat soles |
|
Ice Rescue Helmets |
3 |
$150-300 |
$450-900 |
Anti-fog visor, ear protection |
|
Reach Poles |
2 |
$200-400 |
$400-800 |
6-8m telescoping |
|
Throw Bags |
4 |
$40-80 |
$160-320 |
15-30m floating rope |
|
Ice Rescue Sled |
1 |
$500-1,200 |
$500-1,200 |
Flotation, weight distribution |
|
Rope System Kit |
1 |
$300-600 |
$300-600 |
Static rope, pulleys, ice screws |
|
Ice Picks (team + public) |
10 |
$15-30 |
$150-300 |
Self-rescue devices |
|
Thermal Care Kit |
1 |
$200-400 |
$200-400 |
Blankets, heat packs, first aid |
|
Storage/Transport Bag |
1 |
$150-300 |
$150-300 |
Wheel bag or hard case |
|
Total |
|
|
$5,910-10,820 |
For 3-person team |
Government procurement of ice rescue equipment requires careful evaluation beyond price comparison. Certification requirements should be specified in the tender, including relevant standards for PFD buoyancy, suit waterproofing, and helmet impact protection. Fit evaluation is critical because ice rescue suits must fit individual team members properly for seals to function; procurement should include a trial period or sample sizing session. After-sales service including replacement parts availability, warranty terms, and repair services should be evaluated, as specialized equipment may require factory service for seal replacement or buoyancy testing. Government stockpile programs should also consider storage conditions, shelf life of components, and rotation schedules to ensure equipment remains serviceable throughout the storage period.
Preventing ice rescue incidents through public education is as important as response capability. Ice safety signage should be installed at common ice access points including lake shorelines, pond edges, and river crossings, with clear warnings about ice thickness requirements and danger zones. Signs should include the 4-inch minimum walking guideline, emergency contact numbers, and illustrations of safe ice colors versus dangerous ice. Portable warning signs can be deployed during early freeze and spring thaw periods when ice conditions are rapidly changing. Some communities use automated ice monitoring stations that transmit thickness and temperature data to public websites, helping residents make informed decisions before venturing onto ice.
Community safety programs can promote affordable ice self-rescue kits that anyone recreating on ice should carry. The basic kit includes ice picks worn around the neck, a whistle attached to the outer layer for signaling, and a compact thermal blanket for post-rescue warming. These kits cost under $50 per person and can significantly improve survival chances if someone falls through ice. Schools, community centers, and outdoor retailers can distribute these kits with educational materials about ice safety and self-rescue technique. Public education should emphasize that carrying ice picks in a pocket is ineffective; they must be worn around the neck and accessible with cold, numb fingers.
For schools and community organizations, comprehensive ice safety education packages combine presentation materials with hands-on training equipment. A typical package includes a training DVD or digital presentation, ice thickness demonstration tools, sample ice rescue equipment for familiarization, practice ice picks for self-rescue technique training, and printed educational materials for students to take home. Some programs include a portable ice rescue simulator that allows students to practice crawling and self-rescue techniques without actual ice. These packages support curriculum-based ice safety education that reaches children before they begin independent ice recreation, building lifelong safety habits that reduce ice rescue incidents in the community.
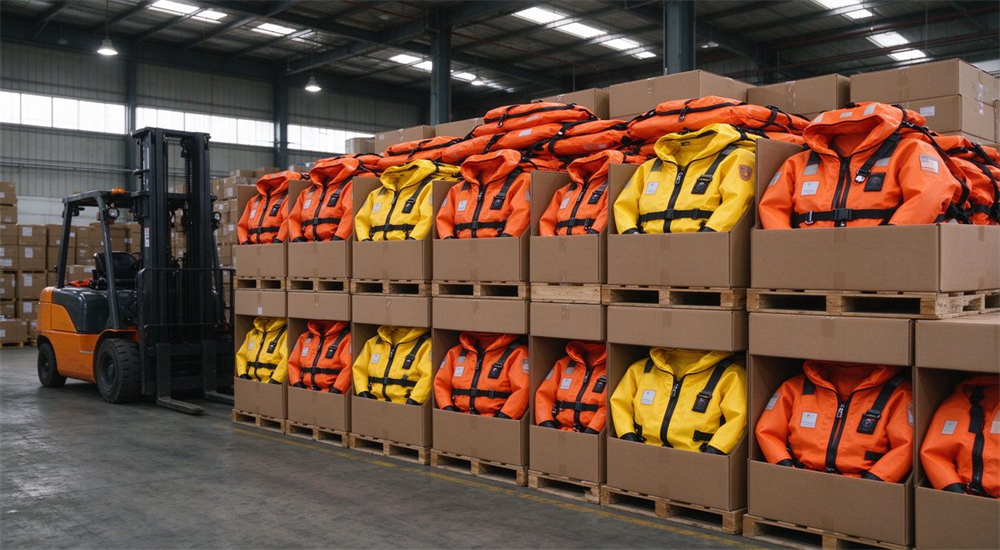
Government procurement teams should require detailed product specifications, certification documentation, and sample evaluation units before finalizing purchase orders. Bulk purchasing can reduce per-unit costs but should not compromise on quality or safety standards for critical ice rescue equipment.
Q9: What is the correct technique for using ice picks?
After falling through ice, orient yourself face-down with both ice picks in hand. Drive both picks firmly into the ice edge simultaneously. Pull your upper body onto the ice surface while kicking your feet hard to propel forward. Once your hips are on the ice, roll away from the hole onto thicker ice, keeping your body horizontal to distribute weight. Never stand up near the hole.
Q10: How should I treat a hypothermia victim after ice rescue?
Remove wet clothing, dry the victim, and wrap in thermal blankets with insulation underneath. Apply heat to neck, armpits, and groin areas using hot water bottles or chemical packs. Give warm sweet drinks only if the victim is fully conscious and able to swallow. Handle gently to avoid triggering cardiac arrhythmia. Seek medical evaluation immediately, and monitor for 24 hours for secondary drowning and afterdrop.
Q11: Can I use a regular life jacket for ice rescue?
No. Regular life jackets or recreational PFDs are not designed for ice rescue. They may not provide enough buoyancy for heavy winter clothing, can restrict the low crawling posture needed on thin ice, and lack the quick-release feature needed if snagged under ice. Use a PFD specifically rated and designed for ice or swiftwater rescue.
Q12: What is an ice rescue sled used for?
An ice rescue sled distributes a rescuer weight over a larger area, allowing them to cross thin ice that would break under standing weight. The sled also provides flotation if the ice breaks, and some models can transport a victim back to shore. It is used in the "Row" phase of rescue when the victim is beyond reach pole distance and the ice is too thin for safe walking.
Q13: How much does a complete ice rescue team kit cost?
A complete kit for a 3-person team ranges from approximately $5,910 to $10,820, including ice rescue suits, helmets, reach poles, throw bags, an ice sled, rope systems, ice picks, thermal care equipment, and storage. Prices vary based on suit quality, certification levels, and included accessories. Government procurement should evaluate total cost of ownership over the equipment service life.
Q14: What certifications should ice rescue equipment have?
Look for PFD certification to ISO 12402 or equivalent standards, suit waterproofing and buoyancy verification to relevant national standards, and helmet impact certification to EN 397 or ANSI standards. For government procurement, specify certification requirements in tender documents and request test reports from suppliers. Equipment without verified certification should not be used for professional rescue operations.
Q15: How long does ice rescue suit last?
With proper care and storage, a professional ice rescue suit typically lasts 5-10 years. Latex seals may need replacement every 1-3 seasons. Buoyancy foam can compress over time, reducing flotation. Always follow the manufacturer service life recommendations and retire any suit that fails inspection, shows significant wear, or has been involved in a significant rescue event.
Q16: What levels of ice rescue training are available?
A16: Ice rescue training is typically offered in three progressive levels. Awareness level training covers ice safety, hazard recognition, and self-rescue techniques for personnel who may encounter ice incidents but are not primary rescuers. Operations level training covers shore-based rescue techniques including reach, throw, and row methods, equipment use, and basic victim management. Technician level training covers advanced ice entry techniques, victim packaging, complex extrication, and multi-team coordination. Most professional fire departments and rescue organizations require at minimum operations level certification for personnel assigned to ice rescue duties, with technician level preferred for team leaders and primary entry personnel. Training should include both classroom instruction and hands-on practical evolution, with annual refresher training recommended to maintain proficiency.
روابط ودية :
حقوق النشر © Custom Disaster - Relief Bedding: Tents, Sleeping Bags, Blankets كل الحقوق محفوظة
الفريق المحترف للخدمة !